This tut was written for those with a basic knowledge of psp.
I am using the awesome artwork of Katerina Koukiotis.
You need a license to use this art work. Please do not use without a license.
You can find this art at Digital Art Heaven HERE
Supplies Needed
I used PSPX...but any of them should work.
Drop Shadow usually V2 H2 50 black
Let's get started
*Remember to add your drop shadow as you go along*
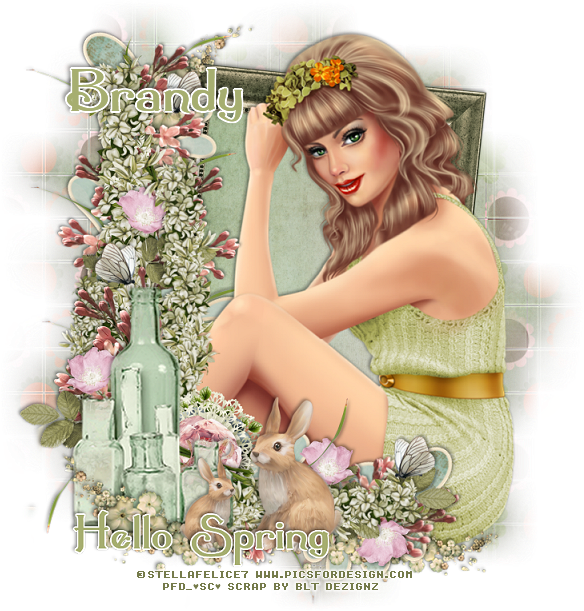
Open a new image 800 x 800 or one you prefer.
Paste paper 7, resize to 21%, apply your mask, delete and merge group.
Resize frame 4 to 20%, free rotate to the left at 15, click inside
with your magic wand, expand by 5, paste paper 7, invert, delete, select none.
Paste your tube, if using the same one I am, I used the misted one.
Resize element 82 to 40%, place below the tube layer by the elbow,
erase any stem showing below, duplicate mirror and move over
to the right more, duplicate again, free rotate to the right at 90, flip,
move down on the right how you like, duplicate, mirror.
Duplicate a couple more times, moving below the paper layer of the
frame on each side and placing how you like.
Resize element 45 to 15%, place on the left below the flowers, duplicate,
mirror, duplicate again and move up some on the right.
Duplicate, flip, move down below the tube layer at the bottom,
duplicate and move over.
Resize element 61 to 15%, place on the right, duplicate and move to the left,
making it look like the dove is trying to put it's beak in it.
Resize element 85 to 20%, place on the left side.
Resize element 31 to 20%, place on the left below the flowers, duplicate,
move over by the elbow of the tube.
Resize element 46 to 20%, move below the paper layer of the frame and
to the bottom.
Resize element 55 to 10%, place on the chair.
Resize element 75 to 15%, place one on each side just above the grass
layer or how you like.
Once happy, close off your background if you used one, merge visible
and apply the
Xero filter, Porcelain, then Mistifier and then Clarity.
Resize first, then add copyright and name.
That's it
Hope you enjoyed doing my tut.